Build Your Own Shopify Print on Demand Store
Table of Contents
- Introduction
- Understanding the Structure of the Video
- Behind the Scenes: Setting up a Shopify Store
- 3.1. Choosing a Name and Domain
- 3.2. Selecting a Shopify Plan and Starting a Free Trial
- 3.3. Connecting a Domain Name
- 3.4. Connecting Printful for Print-on-Demand Products
- 3.5. Exploring Additional Plugins
- 3.6. Designing the Look of the Store
- 3.7. Adding New Pages and Customizing Navigation
- 3.8. Adding Products Using Printful
- 3.9. Setting up Billing and Payment Methods
- Conclusion
How to Set up a Shopify Store: A Step-by-Step Guide
Introduction
In this article, we will guide you through the process of setting up a Shopify store. Whether you are new to e-commerce or looking to expand your online presence, having a well-structured and visually appealing store is crucial for success. Shopify offers a user-friendly platform that makes it easy to create and manage an online store. We will cover everything from choosing a domain name to adding products and setting up payment methods. So, let's dive in and get started!
Understanding the Structure of the Video
Before we get into the nitty-gritty of setting up a Shopify store, let's discuss the structure of the video that prompted this article. The video in question was a seven-day challenge, but it wasn't about uploading a new video every day for seven days. Instead, it was a comprehensive guide to setting up a store over the course of seven days, with each day's progress covered in a separate video.
Behind the Scenes: Setting up a Shopify Store
Now that we understand the context, let's delve into the step-by-step process of setting up a Shopify store. We will cover various aspects, including choosing a name and domain, selecting a Shopify plan, connecting a domain name, integrating Printful for print-on-demand products, exploring additional plugins, designing the look of the store, adding new pages and customizing navigation, adding products using Printful, and setting up billing and payment methods.
3.1. Choosing a Name and Domain
The first crucial step in setting up a Shopify store is choosing an enticing name and ensuring the availability of a domain. A memorable name that accurately represents your brand is essential for attracting customers. Once you have decided on a name, head over to a domain registration service like GoDaddy to check if your desired domain is available. Consider both the domain extension (.com, .uk, etc.) and the length of the registration period (one or two years). Make your selection, add the domain to your cart, and proceed to checkout.
3.2. Selecting a Shopify Plan and Starting a Free Trial
After securing your domain, it's time to choose a Shopify plan that suits your needs. Shopify offers three plans: Advanced Shopify, Shopify, and Basic Shopify. If you are just starting out, we recommend selecting the Basic Shopify plan to ensure you have enough flexibility to scale your business. Before committing, take advantage of Shopify's 14-day free trial to set up your store and ensure it meets your expectations. You won't incur any charges until you go live.
3.3. Connecting a Domain Name
With your Shopify plan in place, it's time to connect your domain name to your store. Shopify allows you to connect the domain manually or automatically, with the latter option being the simplest. By logging into GoDaddy or your domain registration service, you can easily link your domain to Shopify. Once connected, you may need to wait up to 24 hours for the domain to fully propagate. Rest assured that this process is normal and temporary.
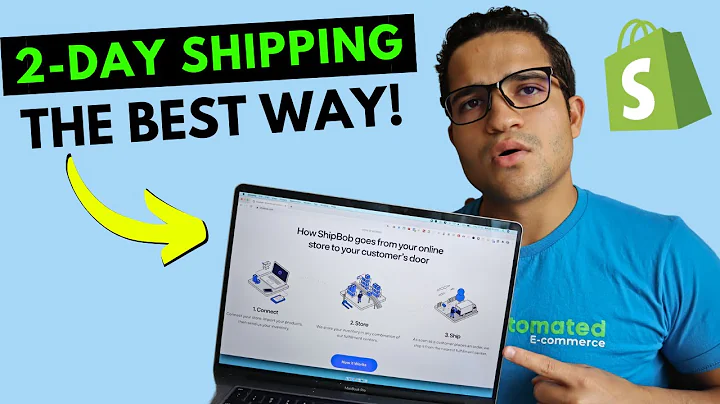
3.4. Connecting Printful for Print-on-Demand Products
If your store involves print-on-demand products, connecting a third-party printing service like Printful is essential. Printful integrates seamlessly with Shopify, allowing you to create custom products with ease. To connect Printful, simply visit their website and follow the instructions to install the Printful app on your Shopify store. Once installed, you can begin creating and selling your customized products.
3.5. Exploring Additional Plugins
Apart from Printful, there are several other plugins available on Shopify that can enhance the functionality of your store. Take some time to explore the Shopify App Store and consider plugins for reviews, cart abandonment, and live chat support. These plugins can improve user experience and boost conversions. One recommended plugin is the Facebook Messenger bot, which enables customers to ask questions and receive immediate responses, adding a personal touch to your store.
3.6. Designing the Look of the Store
Now comes the fun part - designing the look of your store. Shopify provides various themes to choose from, and we recommend starting with the basic theme called "Debut." This theme offers a clean and professional design suitable for beginners. Through the customization options, you can easily add your logo, adjust colors, and arrange the layout of different sections on your site. Don't be afraid to experiment and make it your own!
3.7. Adding New Pages and Customizing Navigation
To provide essential information and navigate customers throughout your store, it's crucial to create new pages and customize the navigation menu. Shopify allows you to add pages like "About Us" and "Contact Us" with ease. You can also rearrange menu items, add dropdown menus, and link to external resources. Take advantage of Shopify's built-in templates for pages like the contact form, which can help streamline communication with your customers.
3.8. Adding Products Using Printful
With your store's structure in place, it's time to populate it with products. If you are using Printful for print-on-demand products, this step becomes straightforward. Inside the Printful app, you can choose from a wide range of products to offer in your store, including apparel, accessories, and home goods. Customize each product with your own designs, descriptions, and pricing. Once set up, your products will be automatically synced with Shopify.
3.9. Setting up Billing and Payment Methods
To ensure smooth transactions on your store, setting up billing and payment methods is crucial. Shopify offers various payment gateways, including the integrated Shopify Payments and popular options like PayPal and Amazon Pay. By navigating to the Payments section in your Shopify settings, you can select the payment providers you want to offer to your customers. It's essential to set up billing in both Shopify and Printful to ensure accurate tracking of expenses and revenue.
Conclusion
Congratulations! You have successfully set up your Shopify store, customized its appearance, added products, and set up payment methods. While this guide provides a basic overview, there is much more you can do to optimize your store and increase sales. Experiment with different marketing strategies, analyze customer data through Shopify's analytics, and consider additional plugins to enhance customer experience. Remember, building a successful online store takes time and effort. Stay persistent and keep learning, and your Shopify store will thrive. Good luck!